BEPRO Space
BEPRO Editor
Cerberus
Login & Signup
Request Match Analysis
2
Cerberus
Basic
All Users
Start Recording
Let's learn how to start recording with Cerberus
Hello, this is the BEPRO team!
In this article, we will learn how to film a match with Cerberus.
Before you begin filming, please first set the optimal angle so that the entire pitch is visible in the Cerberus footage.
For information on setting the Cerberus angle, please refer to the article below.
Angle Setting
1. Select a Pitch
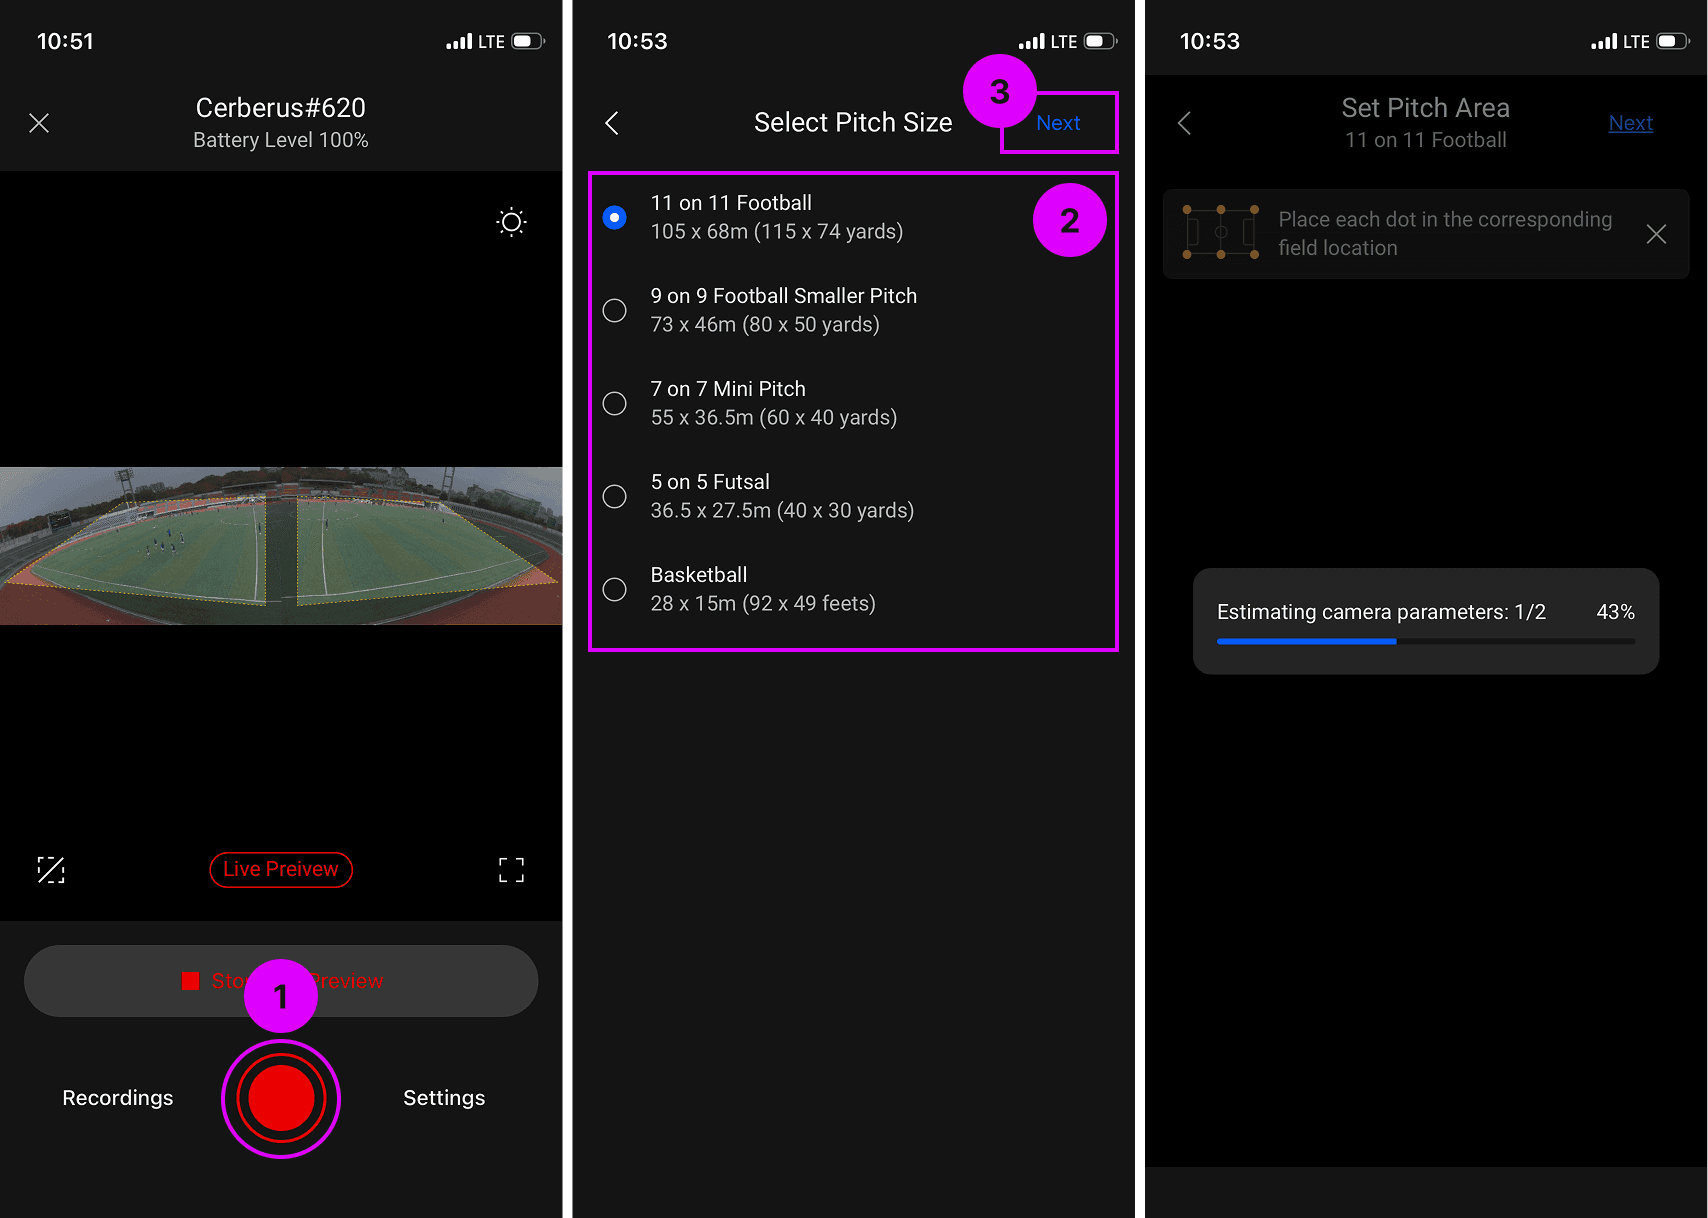
Press the record button at the bottom of the main screen.
Select the pitch size, then press the next button in the top right corner.
Wait a moment whilst Cerberus performs the initial setup, taking into account the current pitch view and the pitch size you have selected.
2. Set Pitch Area
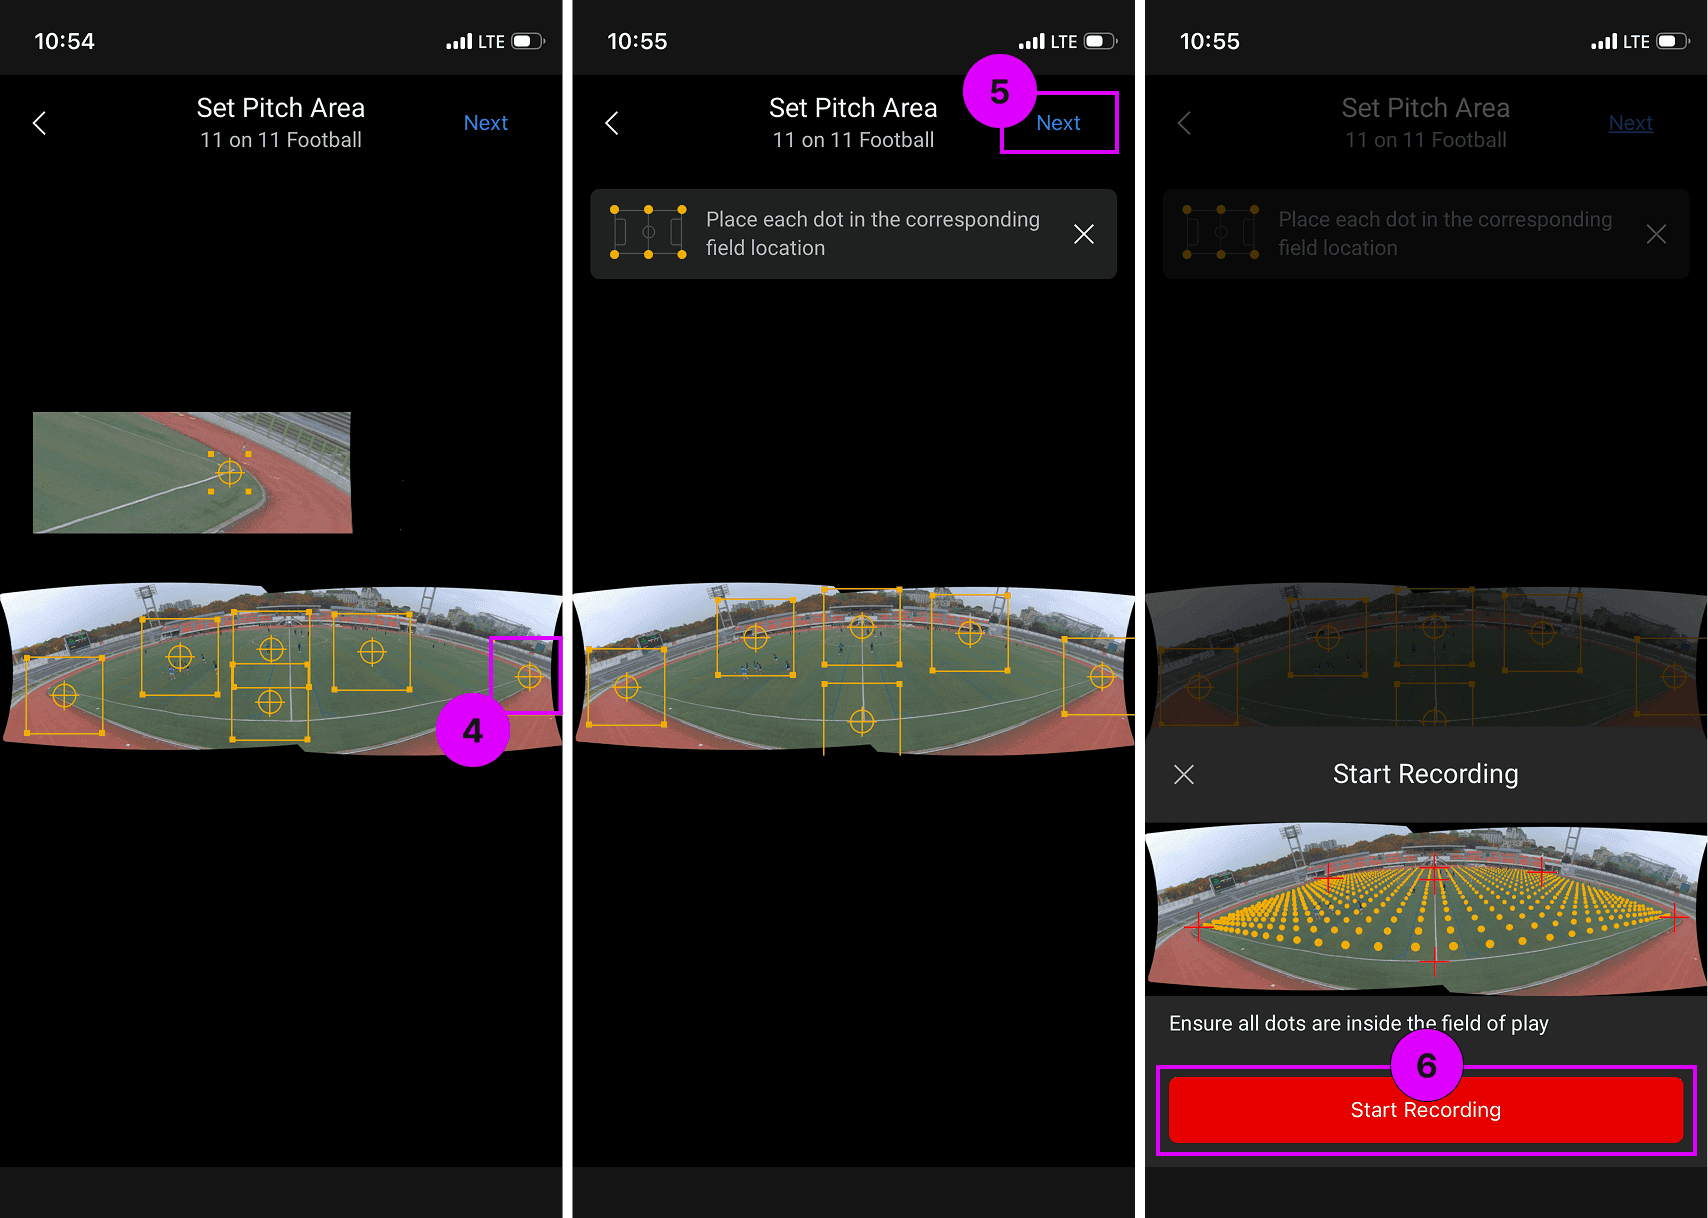
By setting the pitch area in the footage captured by Cerberus, you can reduce unnecessary calculations, improve video processing performance, and enable more natural graphics overlay by calculating perspective.
Drag each of the six yellow handles to position them at the four corners of the pitch and both endpoints of the sideline, totalling six points.
Once you have positioned all the points, press the next button in the top right corner.
Using the preview of the pitch area calculated based on the points you have designated, confirm that the yellow points cover the entire pitch, then press the start recording button.
3. Checking the Footage
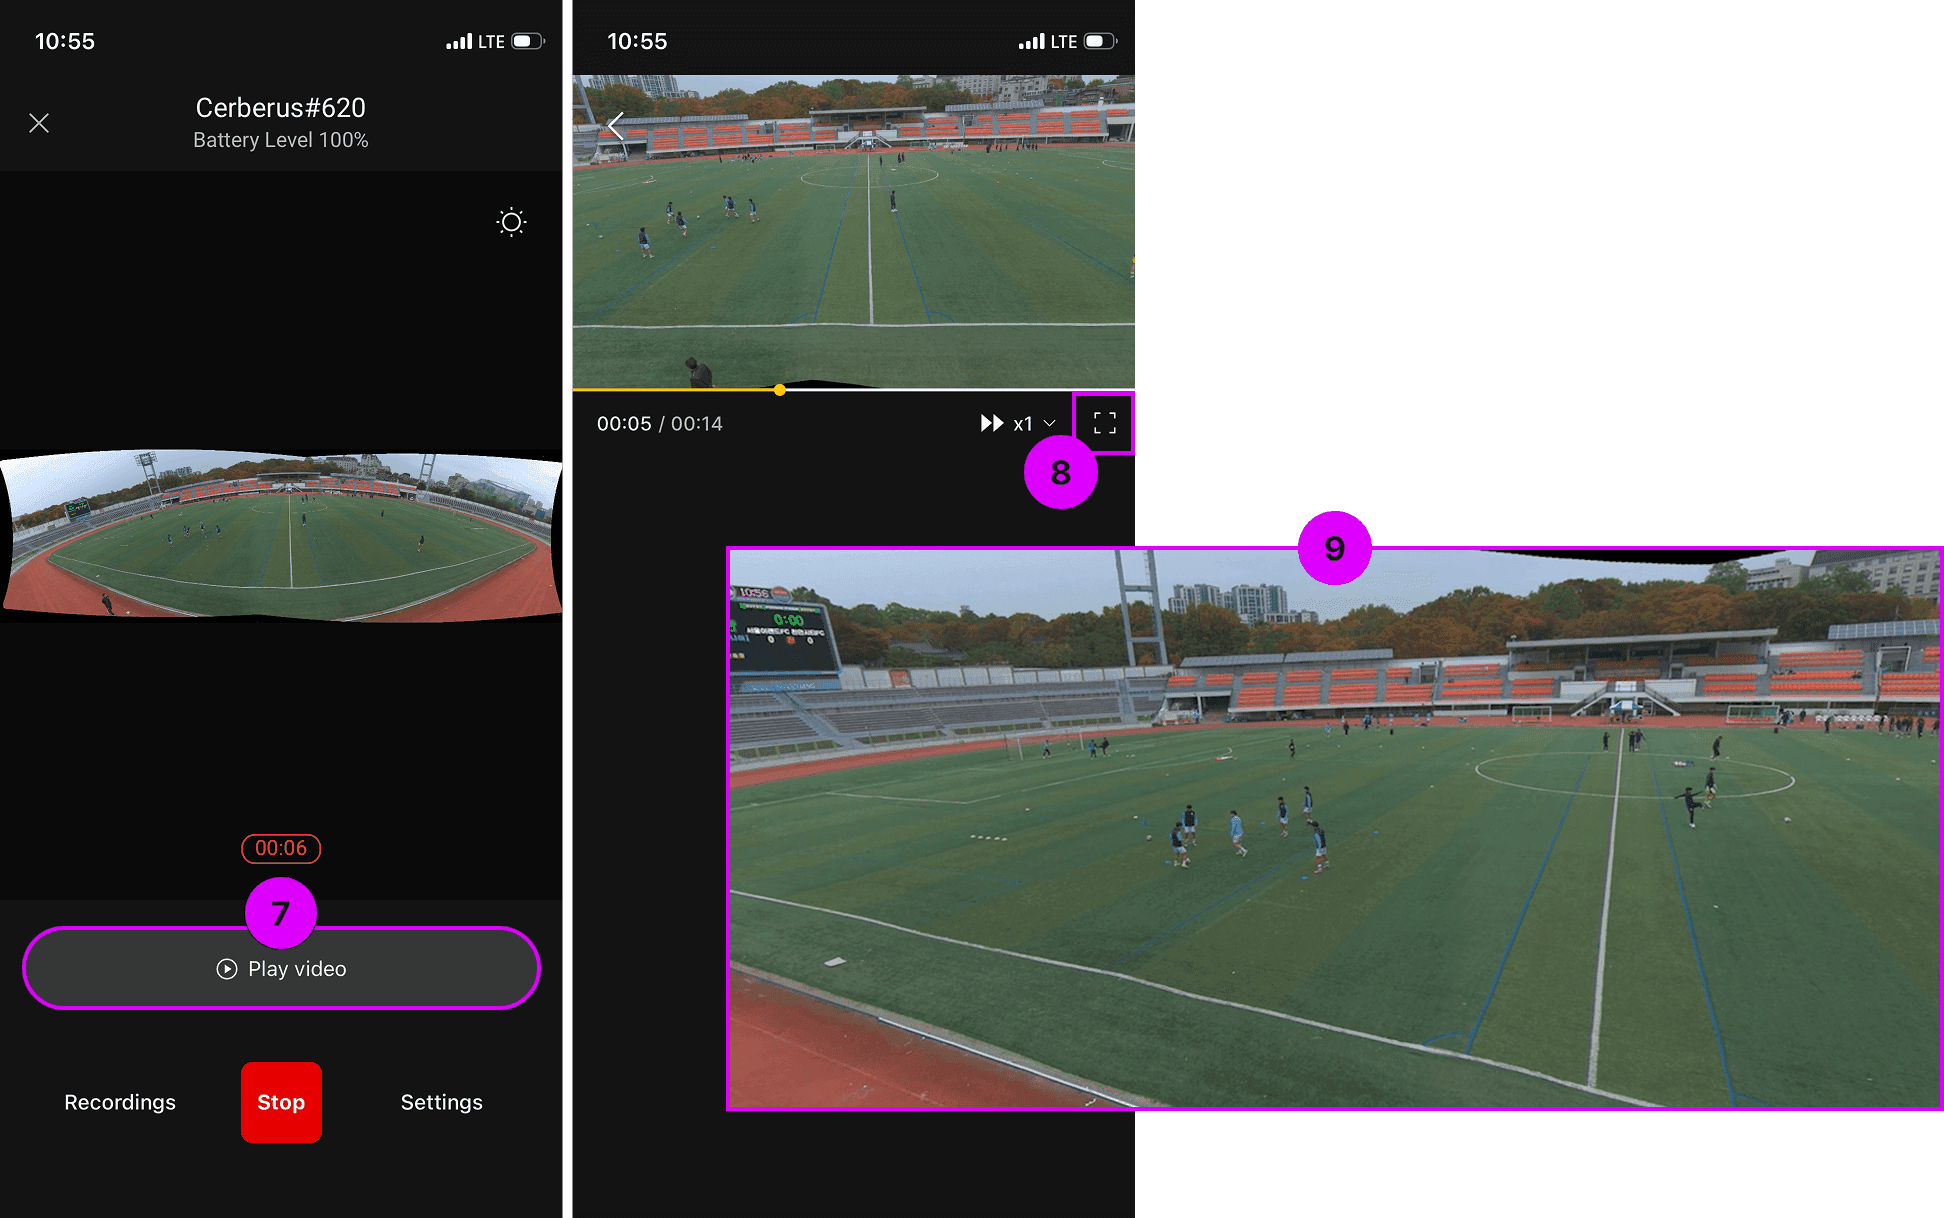
When recording begins, the layout of the main screen will change. You can press the play button above the stop recording button to playback and check the footage currently being recorded using the video player.
To view on a larger screen, press the fullscreen button.
By rotating to landscape mode, you can comfortably view the footage currently being recorded on a larger display.
Previous
Next