BEPRO Space
BEPRO Editor
Cerberus
Login & Signup
Request Match Analysis
1
BEPRO Editor
Basic
All Users
Static Graphic
Let's learn how to add graphics over video
Hello, this is the BEPRO team!
In this article, we'll explore how to add graphics over video footage.
How to Add Graphics
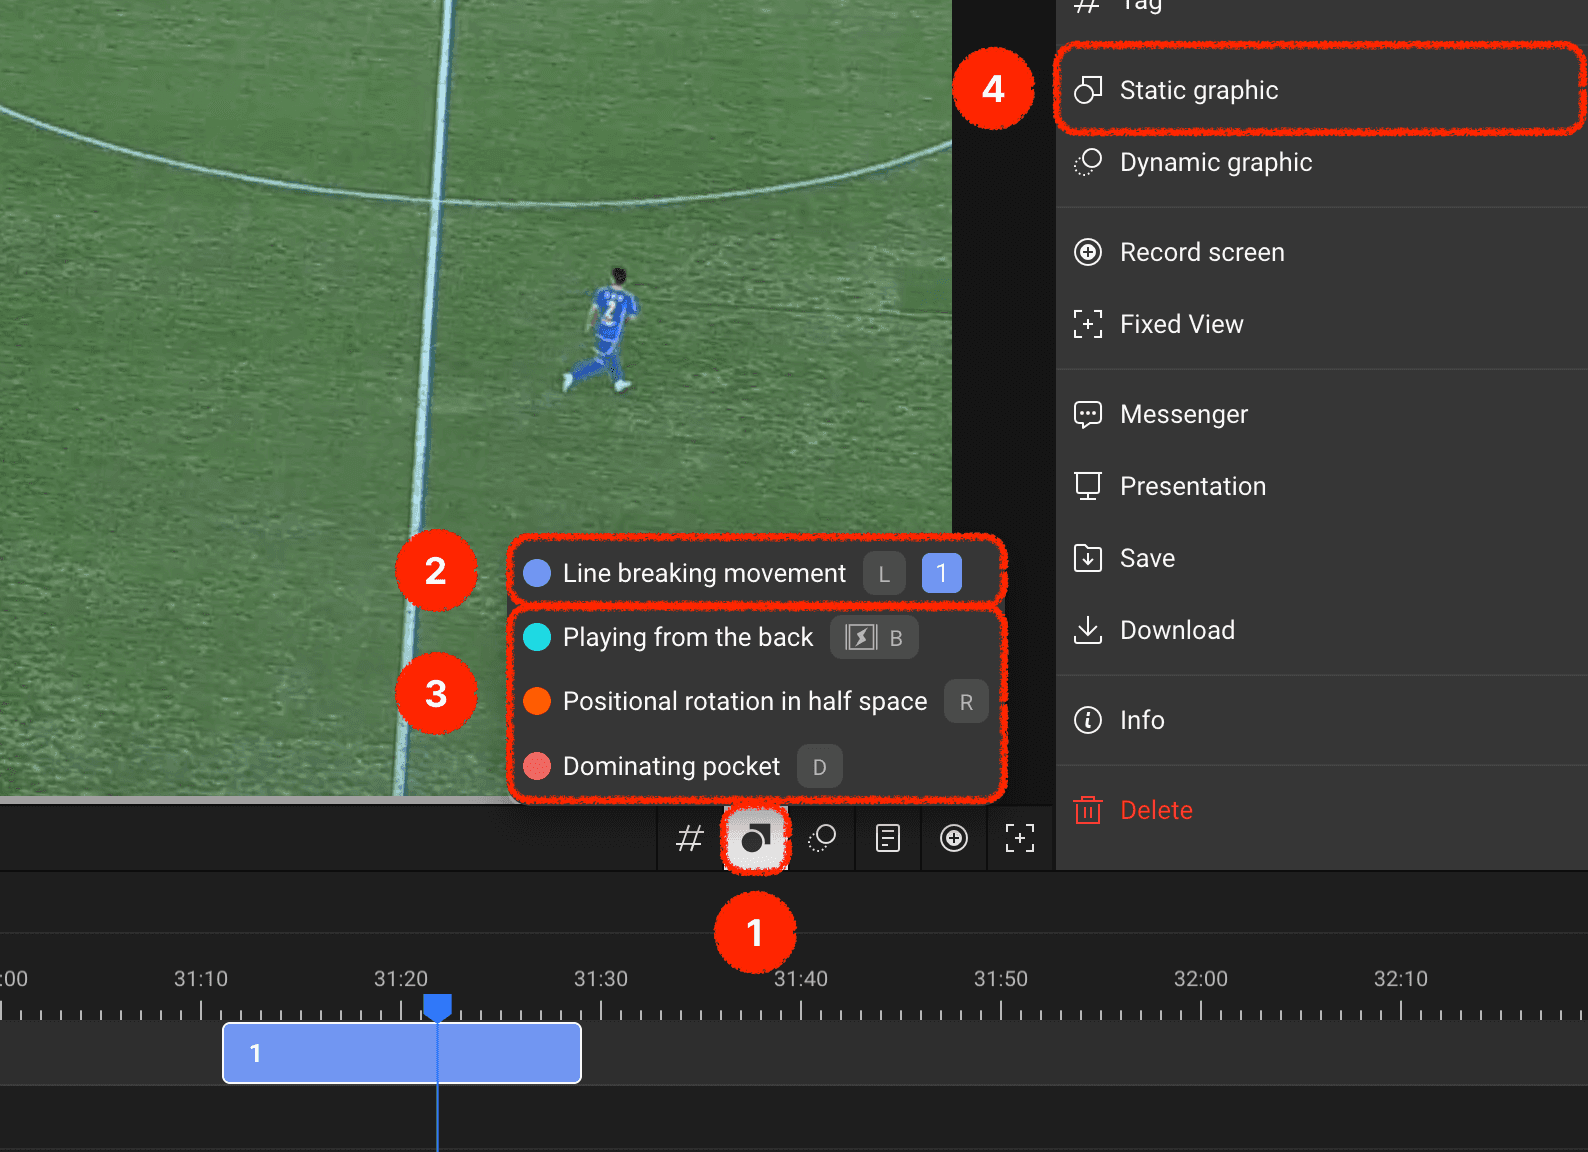
You can add graphics to your desired label track using the graphics add button in the timeline header
If there's a label track with an existing clip at the current playback position, you can add graphics directly to that clip
For label tracks without existing clips at the current playback position, you can create a clip and add graphics simultaneously
Alternatively, you can select a specific clip and add graphics through the graphics add menu in the right panel
Graphics Options
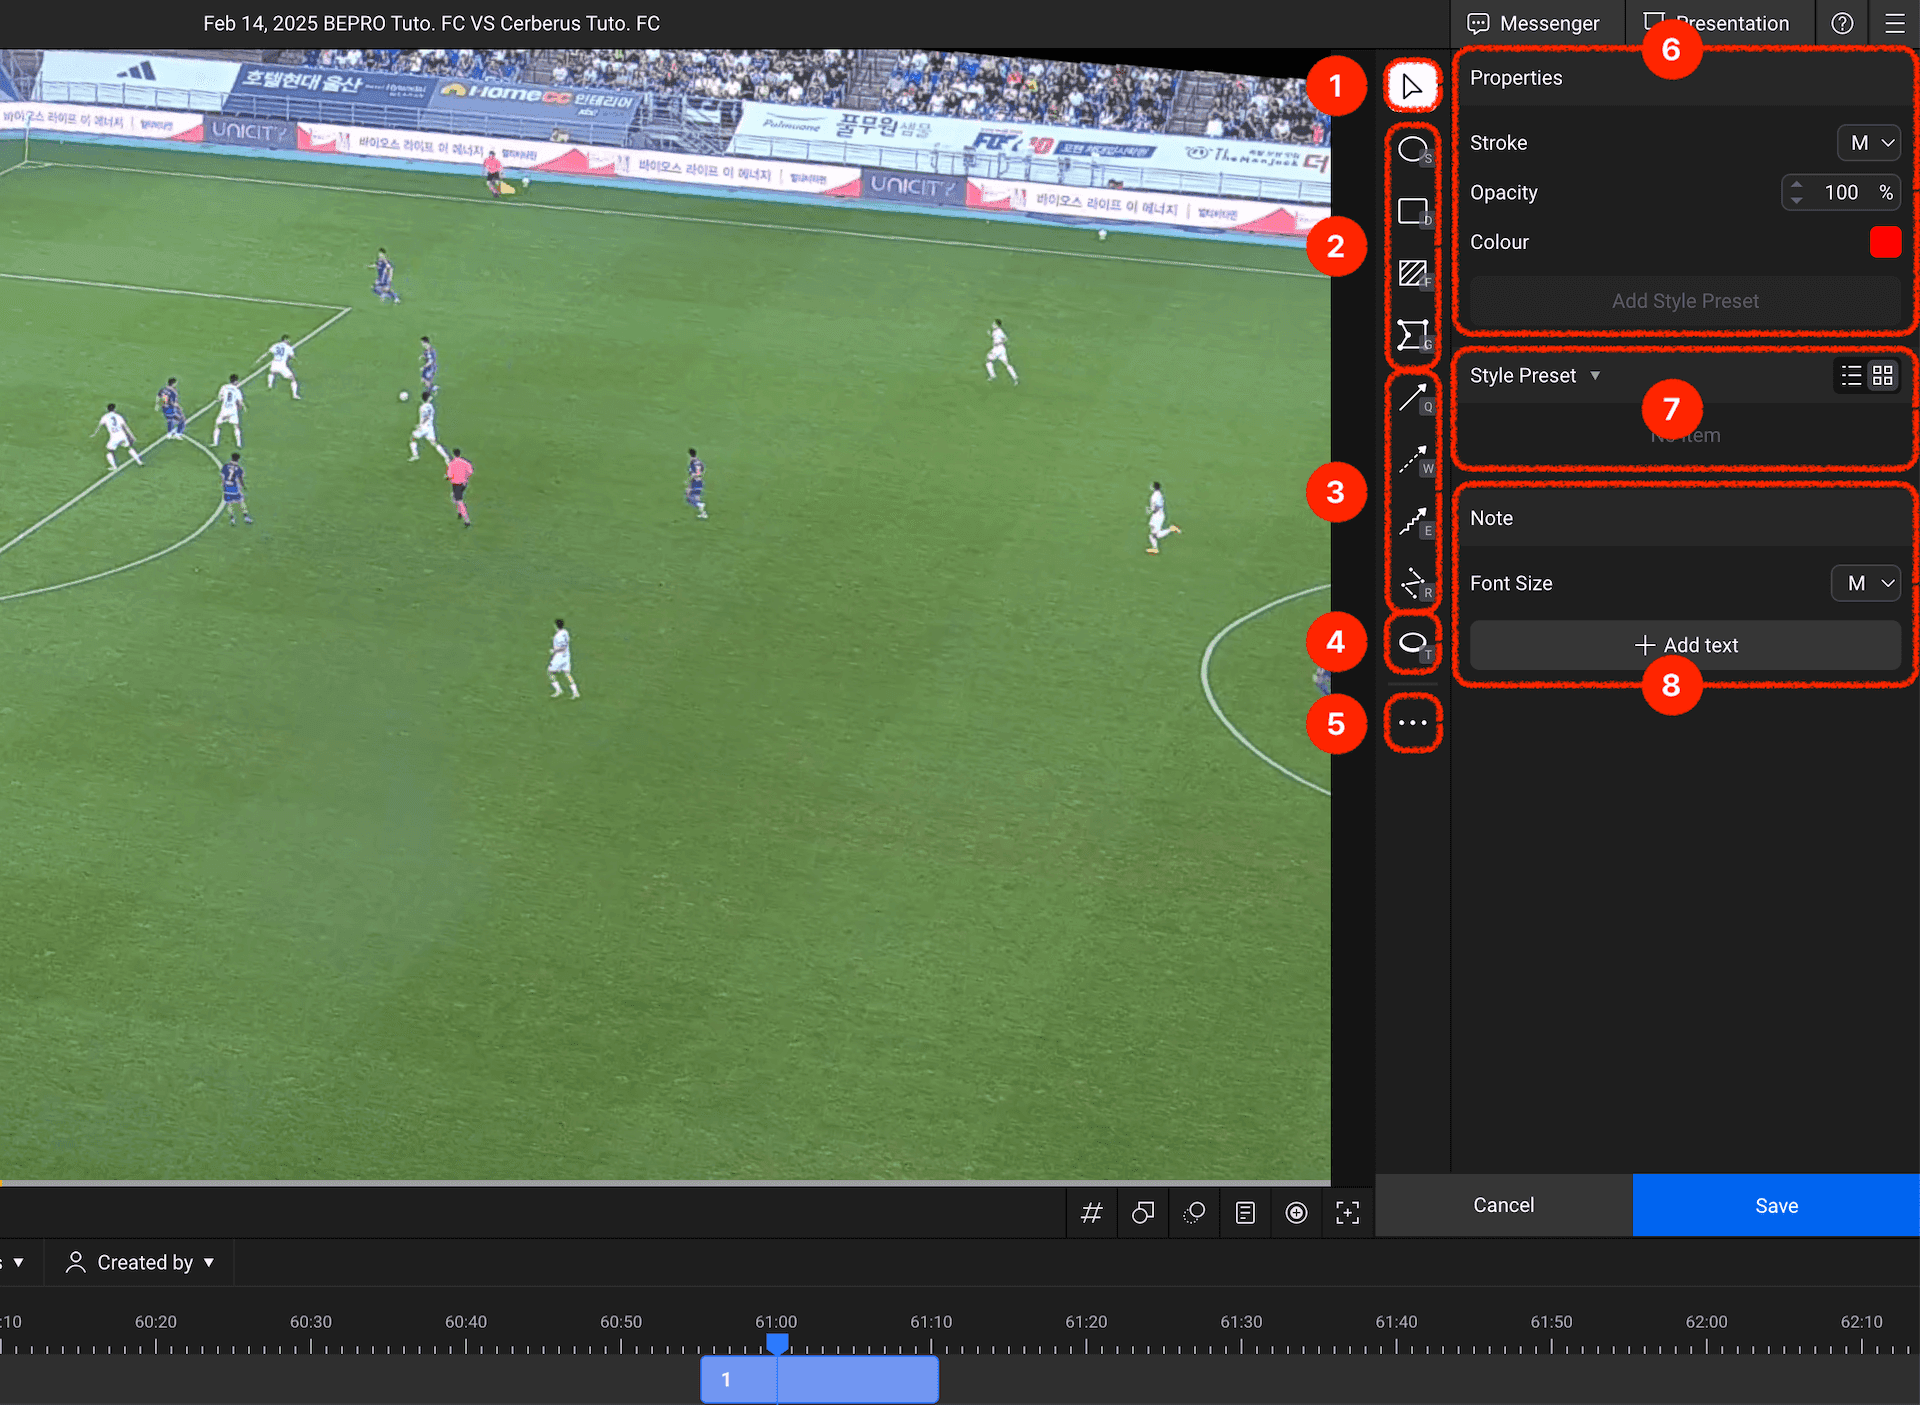
When you enter graphics input mode, the right panel switches to graphics mode.Let's examine each menu one by one:
Move: A tool that allows you to move inputted graphics
Area Marking Tools: Basic shape tools for marking areas, including circles, rectangles, filled rectangles, and polygons
Arrows & Lines: Arrow and line tools for indicating ball or player movements, or for marking lines
Player Highlight: Creates an emphasising circle around a player with a single click
More Options: Contains a menu where you can set keyboard shortcuts for each tool
Graphics Property Settings: Allows you to configure graphic properties such as line thickness, surface colour, and transparency
Style Presets: Frequently used styles can be registered and used as presets
Text Input: Allows you to input text for detailed situation descriptions
Saving Graphics
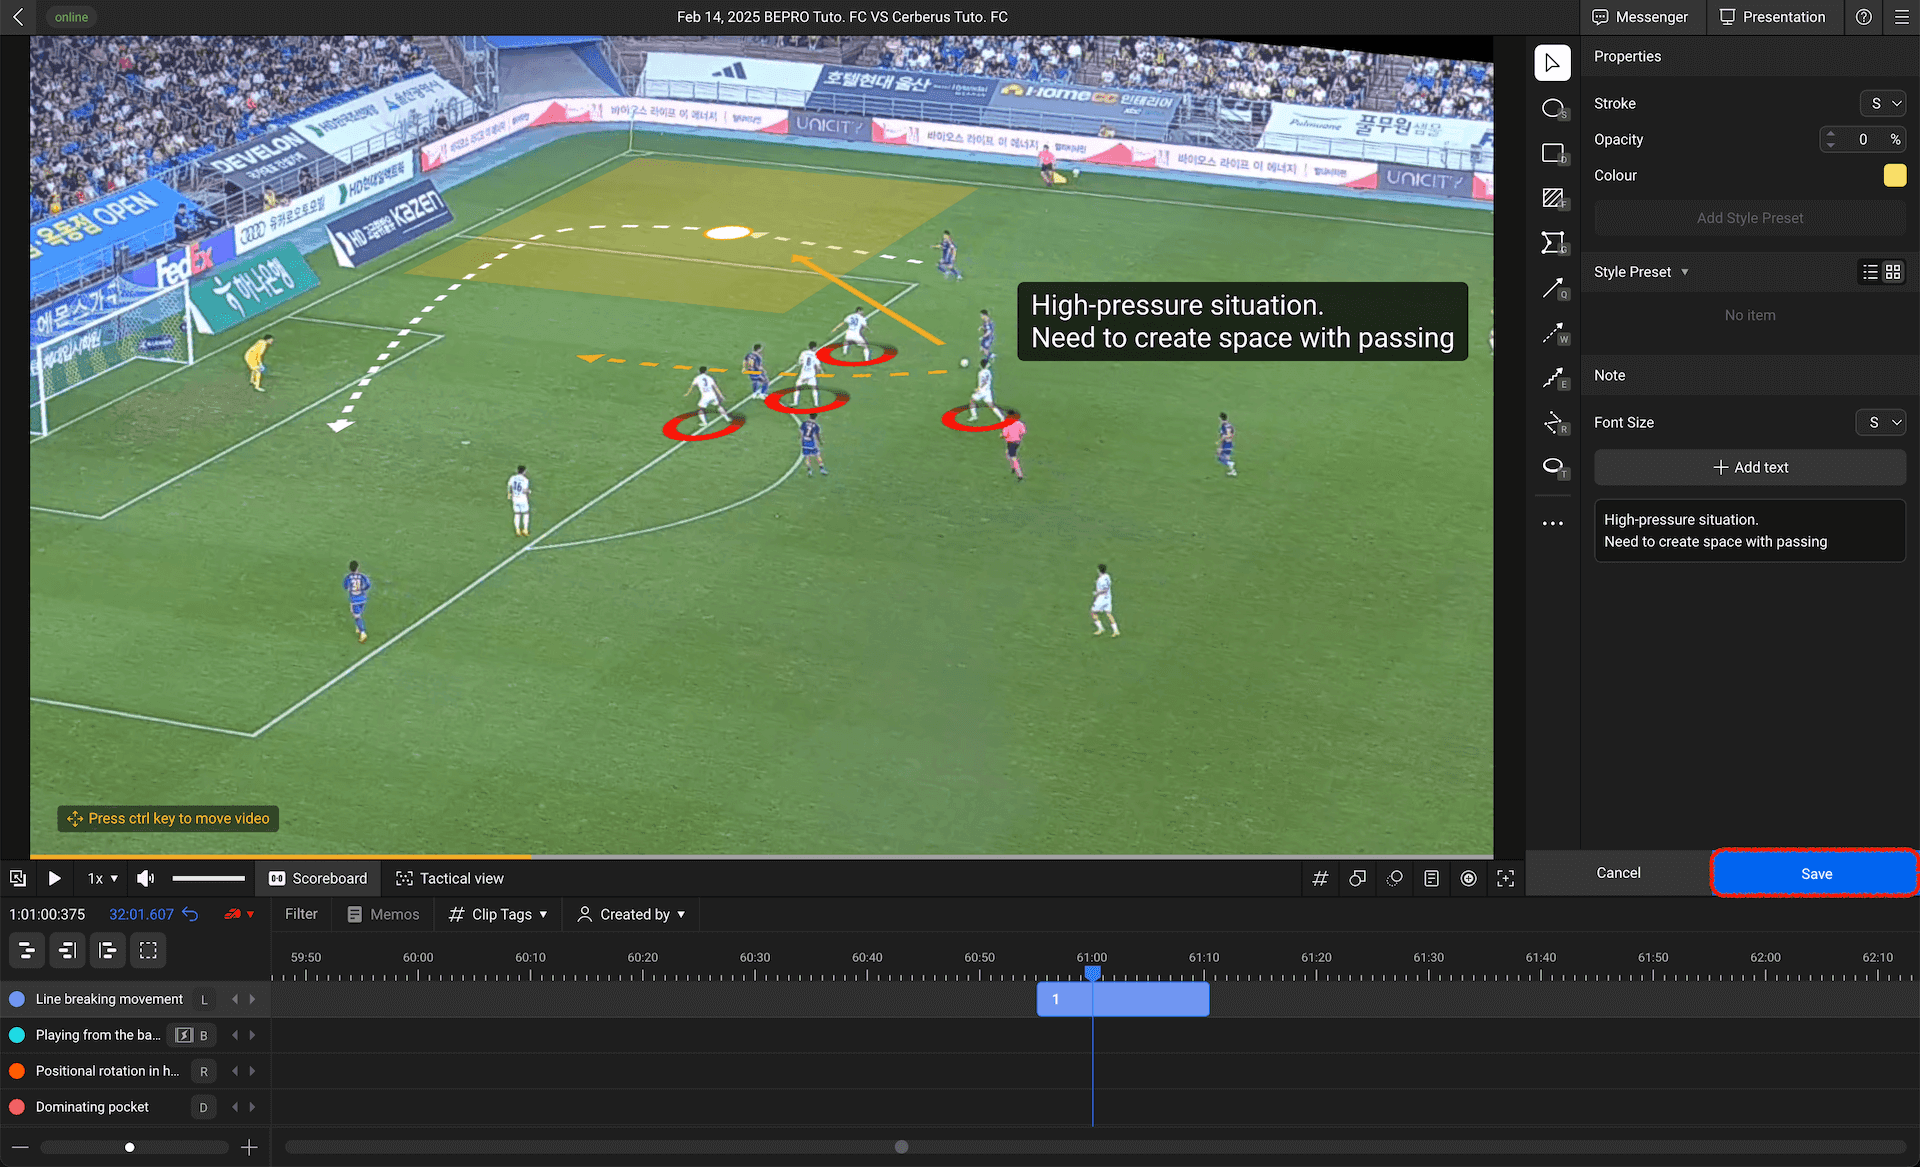
Using the above menus, we've added graphics and text to describe a specific scene.
Once you've finished inputting graphics, you can complete the graphics input by pressing the save button in the bottom right corner.
After completing the input, when you play the clip, the video pauses at the point where graphics were added and the graphics appear.
Editing Graphics
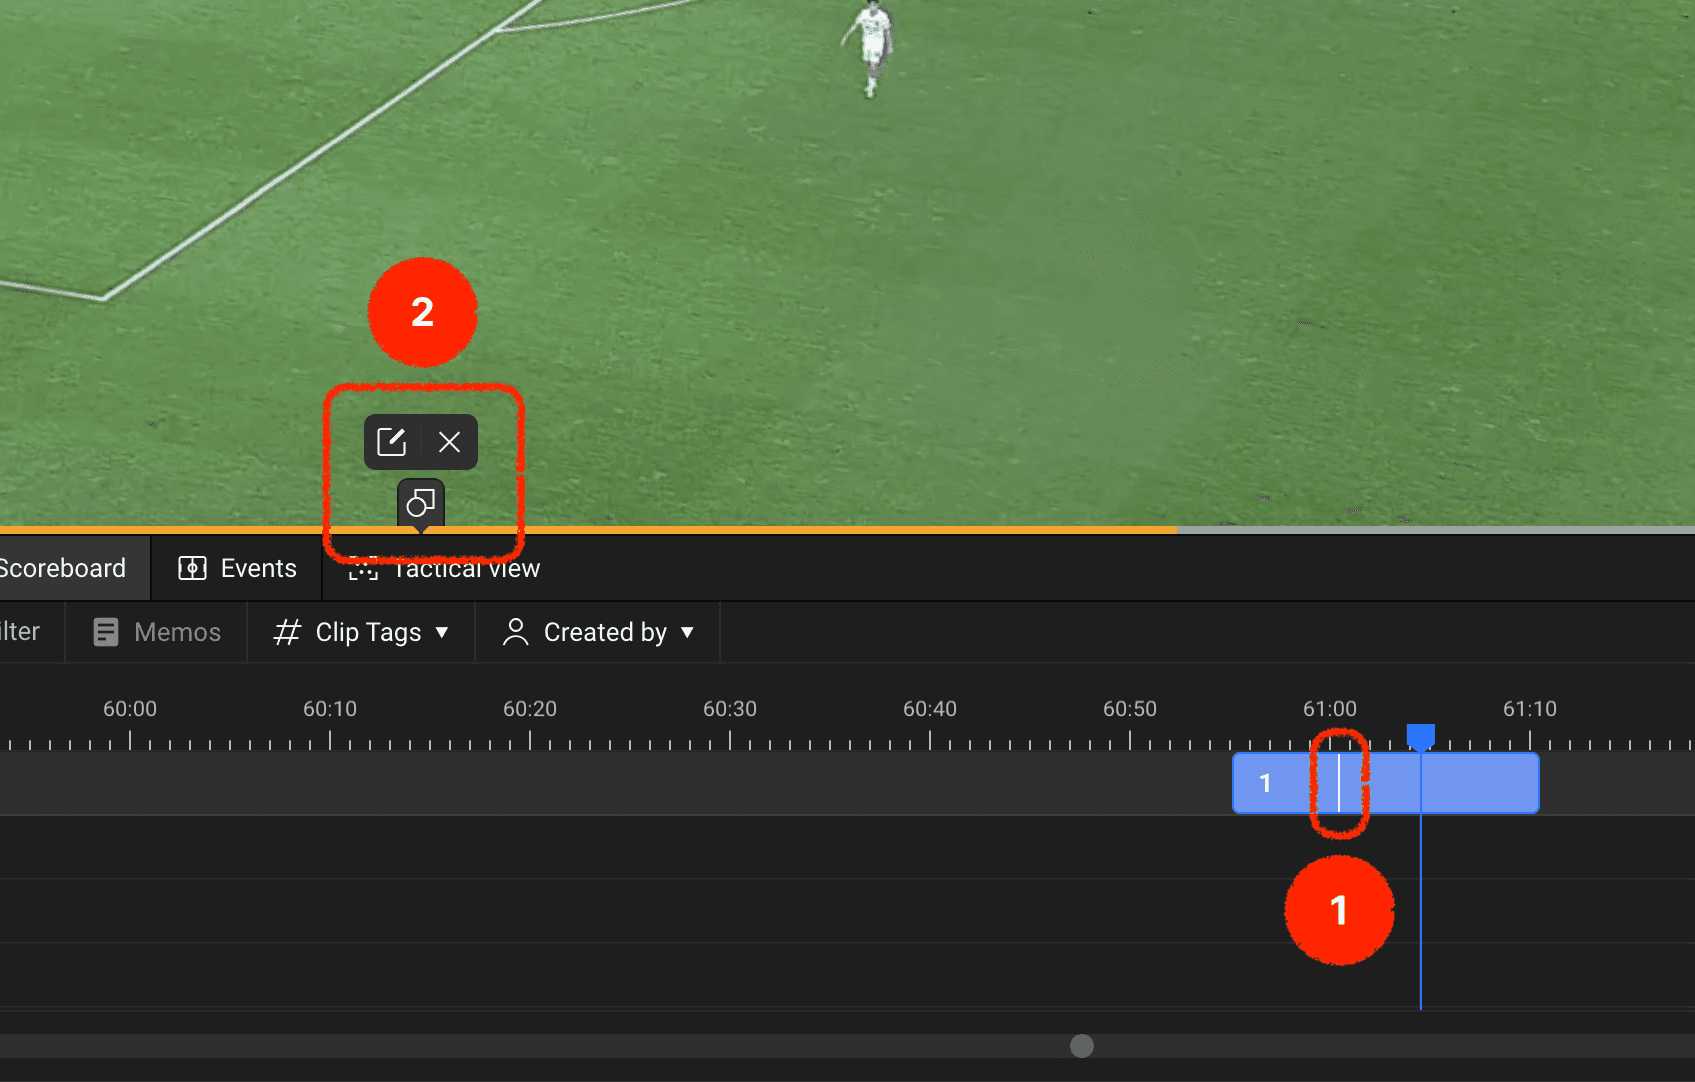
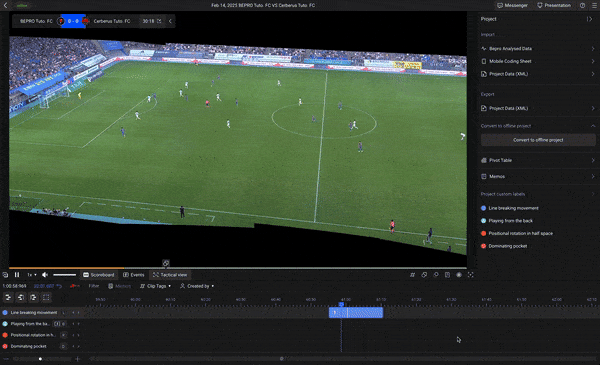
After completing graphics input, a white vertical line appears on the clip at the position where graphics were added.
Double-clicking the clip to play it will display the graphics position on the clip playback bar beneath the video area, and hovering your mouse over it will reveal edit or delete buttons.
If you need to modify the graphics, you can press the edit button to make changes.
Use various tools to describe situations in greater detail and communicate more effectively with your team members!
Previous
Next